
Adding Robots to Your Simulation
This guide provides step-by-step instructions for adding a robot to your simulation environment. We'll be using the Franka robot library as an example, but you can also create custom robots (see the Custom Robots page linked below).
Prerequisites
Before you begin, ensure that:
- The Franka package is properly cloned and installed in your conda environment
- You have the necessary permissions to modify configuration files in your project
- Sim node has been set up
Step 1: Update the Global Configuration
First, add the robot reference to your global configuration file:
simulator:
  # Your existing simulator configuration remains here
  # ...

robots:
  - "robots/franka.yaml"  # Path to robot configuration file
Step 2: Create the Robot Configuration Directory
Create a folder structure as follows:
project_root/
├── config
│	├── global_config.yaml  # Contains simulator settings and component links
│	├── robots/             # Directory for all robot configurations
│	│   └── franka.yaml     # Franka robot configuration file
│	└── ... (other project files)
└── sim_node.py
Step 3: Configure the Robot
Create the franka.yaml file with the following configuration:
name: "Franka"
config:
  source: "urdf"
  urdf_path: "panda_with_gripper.urdf"
  class_dir: "../../ark_robots/ark_franka/franka_panda"
  frequency: 240  # Control frequency in Hz
  base_position:
    - 0
    - 0
    - 0.2
  base_orientation:  # Quaternion (x, y, z, w)
    - 0
    - 0
    - 0
    - 1
  use_fixed_base: true
  initial_configuration:  # Starting joint angles
    - 0
    - 0
    - 0
    - 0
    - 0
    - 0
    - 0
    - 0
    - 0
    - 0
Configuration Parameters Explained
Here's what each parameter in the configuration file means:
- name: A human-readable identifier for the robot ("Franka")
- source: Specifies the model format ("urdf" for Universal Robot Description Format)
- urdf_path: Path to the URDF file containing the robot's physical description (located in the ark_franka package)
- class_dir: Path to the directory containing the robot's class implementation (points to the installed ark_franka package)
- frequency: The control loop frequency in Hertz (240Hz is the default and recommended value)
- base_position: The initial [x, y, z] coordinates of the robot's base in the simulation world (units in meters)
- base_orientation: The initial orientation as a quaternion [x, y, z, w] (the default [0, 0, 0, 1] represents no rotation)
- use_fixed_base: When true, the robot base is fixed in place; when false, the robot can move freely
- initial_configuration: The starting angles for all robot joints (in radians). The Franka robot has 10 joints, including gripper joints
Running Your Simulation: What to Expect
After configuring your robot:
- Run sim_node.py
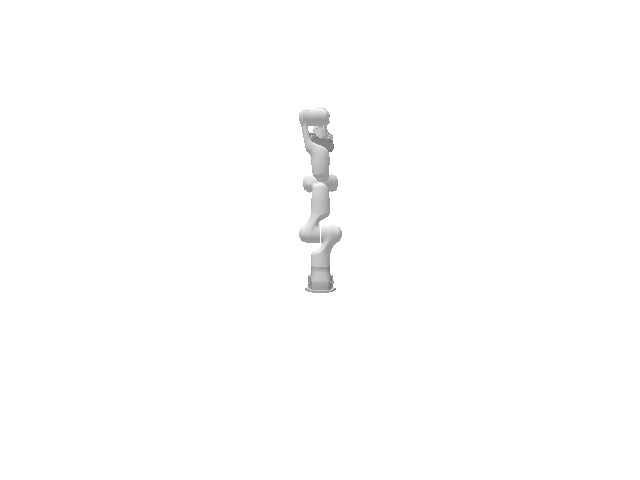
and you should now see a franka in the camera view:
Running Your Simulation: What to Expect
Use this checklist to ensure your robot is properly configured:
- Simulator successfully launches: Run sim_node.py without errors
- Robot appears in viewport: Confirm the Franka robot is visible in the camera view
- Robot positioning is correct: Verify the robot appears at the coordinates specified in base_position
- Joint positions match configuration: Check that the robot's joints are in the expected initial positions
- Control interface responds: Test basic commands to ensure the robot responds to control inputs
If everything checks out, when running sim_node.py you should see a Franka robot in the camera view:
Code can be found:
https://github.com/Robotics-Ark/franka_gym_example
Next Step